
Back on page 12, you learned how to make an image change when the mouse is over it. On this page, you learn more about making rollovers. This page teaches you how to make image maps and incorporating a mouse over event with them. I also show you how image pre-loading is done. First, you need to understand this concept. An image map is created on an image by adding what are sometimes called hotspots to the image. These allow a specific area of an image to have a hyperlink reference placed upon it, and can therefore allow the same image to reference multiple links. Image pre-loading is self-explanatory, so please excuse my redundant explanation. Images which are part of a web page are loaded into the computer's memory before they are actually displayed. This allows the user's computer to more quickly display the images on the web page. I explain this more as we go through this exercise. What we are going to do in this exercise is make an interactive graphical Navigation Bar. Let's get started.
Download this file --> NavBar.zip If the file is not downloading when you click the link, try right-clicking on it and choosing Save Link as, then choose the file destination.
Right-click the file and choose Explore
Highlight all the files in the right window (press ctrl-a to highlight all) and press ctrl-c, which copies these files.
Create a folder called images.
Open the folder images and create a folder called Navigation Bar.
Open the folder Navigation Bar, then copy these files into the folder by pressing ctrl-v.
Go back to the folder where the folder images presides.
|
|
It is important that you create you HTML file here in this folder. You should be two folders back from where you placed those images. The path of your images needs to be images/Navigation Bar/. Be sure that the letter case of the path matches as well. |
Create a new HTML file and set it up like so (the file needs to be created in the folder that contains the folder images):
<html>
<head>
<Script Language = "JavaScript">
<!--
// -->
</script>
</head>
<body>
<map name = "NavMap">
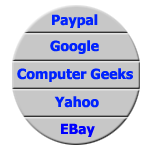
<area href = "http://www.paypal.com/" shape = "rect" coords = "0, 0, 149, 33"
onMouseOver = "document.images[0].src = 'images/Navigation Bar/NavBar2.gif';
document.images[1].src = 'images/Navigation Bar/Paypal.gif';"
onMouseOut = "document.images[0].src = 'images/Navigation Bar/NavBar1.gif';
document.images[1].src = 'images/Navigation Bar/RemoteImage.gif';">
<area href = "http://www.google.com/" shape = "rect" coords = "1, 32, 149, 61"
onMouseOver = "document.images[0].src = 'images/Navigation Bar/NavBar3.gif';
document.images[1].src = 'images/Navigation Bar/Google.gif';"
onMouseOut = "document.images[0].src = 'images/Navigation Bar/NavBar1.gif';
document.images[1].src = 'images/Navigation Bar/RemoteImage.gif';">
<area href = "http://www.geeks.com/" shape = "rect" coords = "0, 59, 149, 90"
onMouseOver = "document.images[0].src = 'images/Navigation Bar/NavBar4.gif';
document.images[1].src = 'images/Navigation Bar/Geeks.gif';"
onMouseOut = "document.images[0].src = 'images/Navigation Bar/NavBar1.gif';
document.images[1].src = 'images/Navigation Bar/RemoteImage.gif';">
<area href = "http://www.yahoo.com/" shape = "rect" coords = "0, 88, 149, 118"
onMouseOver = "document.images[0].src = 'images/Navigation Bar/NavBar5.gif';
document.images[1].src = 'images/Navigation Bar/Yahoo.gif';"
onMouseOut = "document.images[0].src = 'images/Navigation Bar/NavBar1.gif';
document.images[1].src = 'images/Navigation Bar/RemoteImage.gif';">
<area href = "http://www.ebay.com/" shape = "rect" coords = "0, 118, 149, 149"
onMouseOver = "document.images[0].src = 'images/Navigation Bar/NavBar6.gif';
document.images[1].src = 'images/Navigation Bar/Ebay.gif';"
onMouseOut = "document.images[0].src = 'images/Navigation Bar/NavBar1.gif';
document.images[1].src = 'images/Navigation Bar/RemoteImage.gif';">
</map>
<img src = "images/Navigation Bar/NavBar1.gif" border = "0" usemap = "#NavMap">
<br>
<img src = "images/Navigation Bar/RemoteImage.gif">
</body>
</html>
We used a different kind of href tag here. Notice the tag right below the <body> tag --> <map name = "NavMap">. This is the tag that begins the image map. This image map does not end until near the bottom on the line above the tag for the navigation bar's initial image source using the </map> tag. We place all our onMouseOver and onMouseOut events between this tags. Notice the difference between the typical href tag and the tags we used between the map tags. We use the tag <area href> instead of <a href>. This <area href> tag defines a certain portion of the image to a hyperlink reference, thus allowing several hyperlinks to be placed on this image, thus allowing one image to reference more than one link. Some people call these hotspots.These hotspots we used are assigned values to the shape and coords (coordinates) properties. The shape property tells the map how the hotspot is shaped. In this case, we specified rect to this property for rectangle. Other hotspots can be circle or polygon (a shape bounded by straight lines). The shape rect needs 4 different values for the coordinates. The coordinates are assigned like so: coords = starting pixel across from left corner of image, starting pixel down from left corner of image, amount of pixels across, amount of pixels down. So if we have an image that is 50 pixels X 50 pixels, assigning the values to coords as 0, 0, 50, 25 says start at pixel 0 across and 0 down, then go across 50 pixels and down 25 pixels. In this case, the hot spot is defined on the top-half of the image.
Load the page and see how it looks. You should see the Navigation Bar displayed on the page. When you move the mouse over the Navigation Bar, the image beneath the bar should change. An image is not displayed when the mouse is not over a link, but an image is displayed when the mouse is over it. Notice that we use 2 commands in each mouse event. The remote image changes to another image when ever the mouse is over the hyperlink area. The Navigation Bar changes by using the command document.images[0].src because the Navigation Bar is the first image on the page. That is, the img tag in the HTML code which inserts it on the page comes before the other img tag for the remote image. Therefore, because the remote image is inserted after the Navigation Bar, it is given an index of 1, and is changed using the command document.images[1].src.
Now that we have the mouse-overs working, it is time to pre-load the images.
Between the script tags, type the following lines:
var index = 0;
var navBarImages = new Array(12);
var loadedImages = new Array(12);
navBarImages[0] = "images\Navigation Bar\RemoteImage.gif";
navBarImages[1] = "images\Navigation Bar\Paypal.gif";
navBarImages[2] = "images\Navigation Bar\Google.gif";
navBarImages[3] = "images\Navigation Bar\Geeks.gif";
navBarImages[4] = "images\Navigation Bar\Yahoo.gif";
navBarImages[5] = "images\Navigation Bar\Ebay.gif";
navBarImages[6] = "images\Navigation Bar\NavBar1.gif";
navBarImages[7] = "images\Navigation Bar\NavBar2.gif";
navBarImages[8] = "images\Navigation Bar\NavBar3.gif";
navBarImages[9] = "images\Navigation Bar\NavBar4.gif";
navBarImages[10] = "images\Navigation Bar\NavBar5.gif";
navBarImages[11] = "images\Navigation Bar\NavBar6.gif";
for (index = 0; index < 12; index++)
{
loadedImages[index] = new Image();
loadedImages[index].src = navBarImages[index];
}
The first three lines set up our variables. We use the variable index to increment through the array in the loop on line 18. The two arrays we create are called navBarImages and loadedImages, set up as 12 different elements. We use the array navBarImages to store the path of all the images used in this page as a string. Line 18 begins a for loop, iterating through 12 values 0 through 11 for variable index. This loop's code sets each array element of array loadedImages to a new instance of an Image() object, then sets the source of the object instance to each image path, which is stored in the array navBarImages. This object instance inherits the properties of the Image object, such as the src (source) property. This command is what loads the images into memory. Because this code is entered in the header portion of this HTML file, the images are loaded into memory before the image is displayed and before a rollover is performed.
Everything should work dandy now. If you are having any problems with the images displaying when the mouse is on a link, make sure that the path of the images in the coding matches perfectly with the location of the images. Now we can move on to other things on Page 18.